logo_3_1

Pages

malta country of half neglected

As I sat freezing at a café in Malta, I wondered if I had made the right decision to visit.

The most naturally beautiful countries in the world

You’d be hard-pressed to find a country that doesn’t offer any natural assets, but some are more naturally gifted than others.

14 major travel scams to avoid

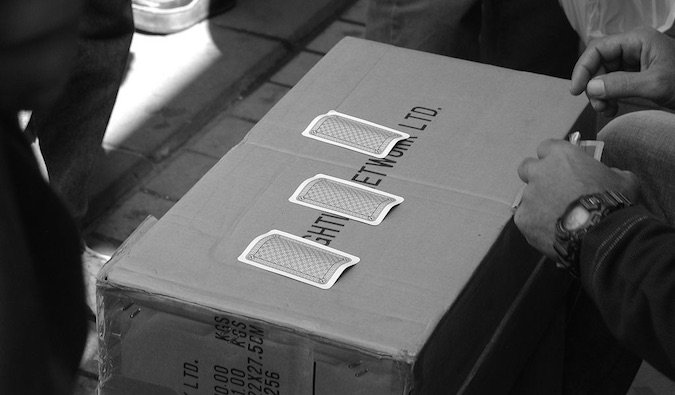
On my first big non-tour trip, I got scammed twice on the same day

2017: THE YEAR YOU MAKE TRAVEL HAPPEN

One of the most common New Year’s resolutions people make is to travel more. It’s right up there with eating better and going to the gym more

BEST TRAVELING WEBSITES THAT YOU SHOULD KNOW

Technology's effects on the travel industry are widespread, with innovation

Friday, 26 May 2017

10 SIMPLE TIPS TO HELP YOU AVOID GETTING SICK WHEN YOU TRAVEL


get a lot of questions about health care on the road – “How can I avoid getting sick? What need vaccines? What happens when I do get sick?” Since I’m not a doctor, I don’t like giving medical advice so I’ve asked Mike Huxley, a registered nurse and author of the blog Bemused Backpacker to write a few articles on health and safety when you travel. His first article focused on creating the perfect first aid kit. This article features easy ways to stay healthy on the road.
Getting sick is a part of everyday life, and being on the road doesn’t exempt you from that fact, especially when travel itself it exposes you to a whole new range of bugs, parasites, and environments. The fact of the matter is the longer you are traveling, the more likely you are to pick up a bug or two.
The key to minimizing the chances of this, however, is to actively combat the risk factors of becoming sick in the first place. The last thing you want to do is to expose yourself to any more risk than you have to. Prevention is far better than any cure.

Wash your hands

Outdoor sinks used to ask your hands and prevent illness
I know this sounds basic, but it is surprising how many people forget it, and as a nurse, the simple act of washing your hands has been drilled into me since day one of basic training as a key component in infection control. The National Health Service (NHS) in the UK has had a huge impact on controlling infection in a clinical setting simply by reinforcing the importance of washing your hands, but the same is true for every aspect of day-to-day life, and traveling the world is no exception.
Hand hygiene is essential to stop the spread of infection and can dramatically reduce your chances of diarrhea, vomiting, food poisoning, gastroenteritis, flu, norovirus, MRSA, or even hepatitis A.
Many travelers carry small bottles of hand gel, and these are great as a backup, but they aren’t a replacement for good old soap and water. Wherever possible, wash your hands under hot water for at least thirty seconds before and after eating and always after going to the toilet.

Drink bottled water

Two bottles of water in the green grass
When you can’t be sure of the purity of the local water or you are traveling in areas where sanitation is not that great, then it should go without saying that you should avoid the local tap water. Even if locals drink it without any problems, your stomach may not have the right bacteria to protect you from becoming ill, avoid local water — even ice in your drinks — in countries that don’t purify their tap water.
I recommend that at the very least you should always drink bottled water and double-check that the seal is intact on the bottle top too (a common scam is to sell bottles refilled with tap water). It is also a good idea to use bottled water to brush your teeth. But personally I prefer to use a water bottle with a built-in filter as this reduces the need to buy bottles of water constantly, saving both money and the environment.

Be careful of food contamination

Thai feast of fish and noodles at an outdoor restaurant
Food contamination is one of the biggest causes of traveler’s diarrhea and gastrointestinal problems on any travel adventure. If you are not careful with your food on your travels, you could potentially be exposing yourself to diarrhea, E. coliShigellaSalmonellaGiardiaEntamoeba hystolyticaCampylobacterCryptosporidiaCyclospora, cholera, and much more nastiness.
You should always ensure — as much as is practicably possible — that any food you eat is fresh, cooked thoroughly, and served piping hot.
I love street food for this very reason, as you can see how clean the cooking environment is, and the food is often prepared right in front of you. But look out for signs of good hygiene practice at any street food stall or food court you eat at. Does the person handling the food wear disposable gloves and change them frequently? Is there a separate person handling the money or, at the very least, does the person cooking the food remove and replace gloves every time they handle cash? Is hand washing a regular occurrence? Is raw food left out in the open or is it stored correctly? These things may seem inconsequential but they are important.
You may want to avoid — or be very careful of — the following:
  • Salads that may have been prepared in local untreated water
  • Raw fruit and vegetables that you haven’t peeled or skinned yourself (if you have, they are generally fine)
  • Food that has been left out and exposed for a period of time
  • Food that is shared, such as in buffets undercooked, raw, or reheated food, especially meat, fish, or rice.
You probably aren’t going to avoid a bit of stomach upset completely on your travels — especially if you are traveling long term — but if you are aware of good food hygiene practices and follow them as much as possible, then you can at the very least minimize the risk of becoming ill.

Don’t be afraid of having familiar food

Man sick in bed with food poisoning during his travels
Eating local food and delving into the local cuisine is one of the absolute true pleasures of traveling and one you should never miss out on, but that said, a degree of common sense is needed too. Jumping straight into a diet of spicy curries or predominantly red meat is a good way to ensure some form of gastrointestinal upset if your stomach isn’t used to it.
Food intolerances happen when your gut can’t properly digest the food you’ve eaten, or you’ve introduced something completely new and different to it, which can irritate the digestive tract and lead to stomach pain, cramps, gas, diarrhea, vomiting, and heartburn. Don’t worry — this generally isn’t serious and will pass relatively quickly. The trick to trying new foods and new cuisine is to mix it up a little bit.
If you have a sensitive stomach, take it easy at first and don’t be afraid of eating familiar food from time to time.

Try and stay active

Man who climbed to the top of a mountain overseas
One of the best ways to stay fit and healthy and fight off unwanted infections is exercise. The benefits of exercise are well known and well documented: it improves your overall health and well-being and strengthens your immune system, which makes you less susceptible to illness. And if you do get sick, your body is better able to fight off the infection and more quickly get you back on your feet. It isn’t foolproof, of course, because fit people still get sick, but in general the fitter you are, the better your body will be at shrugging off that annoying bug or illness. I always try and maintain a healthy lifestyle, and that doesn’t change because I am traveling.
If you aren’t active or fit before you start traveling, use it as an excuse to start! Go on a jungle trek, go hiking into the countryside or up a mountain, swim in the sea, go for a jog — whatever tickles your fancy as long as it gets you a little out of breath.

Protect yourself against the sun

Sun shining through tall plants
Sunburn can seriously ruin a good travel experience! I got very badly sunburned years ago in Thailand after snorkeling for too long and forgetting to reapply sun cream. It is not an experience I want to repeat!
Current recommendations on sun protection say you should use a minimum of factor 15, though I recommend at least SPF 30.
Protecting yourself from the sun goes beyond getting bad sunburn though. You should also stay well hydrated if you are traveling in a country or region with a hot or tropical climate, as well as cover up with loose clothing and even a hat or scarf. If you don’t, then dehydration can set in very quickly, and that can lead to more serious conditions such as exposure, heat exhaustion, and heatstroke, which if left unattended can become a medical emergency.
I once cut a day’s sightseeing short in Egypt when I spotted the signs and symptoms of heat exhaustion developing in another traveler and had to help her to get rehydrated and cooled down. It happens a lot more easily than many people think so be sensible, use sunscreen, cover up, and stay hydrated.

Get vaccinated

Backpacker getting vaccinated before he travels
Vaccinations are probably one of the most common travel health concerns that people ask my advice on in my capacity as a qualified nurse. There is no one-size-fits-all answer to those questions, however, due to the unique nature of individual circumstances, but there is one universal constant: If you can protect yourself, it is a good idea to do so.
Prevention is always better than the cure, and nothing is better at protecting you from the risk of getting a disease than being vaccinated against it.
Not all vaccinations are required for every individual for every trip, and a lot depends on what vaccinations you have already, what country or region you are visiting, and individual factors, such as your personal medical history, how long you will be traveling, and what you will be doing. This is why it is essential that you get one-on-one personal advice from your local travel clinic, nurse specialist, or physician before you travel.
To give you a basic understanding of the types of vaccinations you will need, however, they are often broken up into three distinct categories:
  • Routine vaccinations are the ones that everyone gets throughout their childhood and early adult life; specific schedules (and sometimes the vaccine administration itself) do differ from country to country, but these generally include the BCG vaccine, the pneumococcal conjugate vaccine, and vaccinations for diphtheria, tetanus, and pertussis (DTP); hepatitis B; hepatitis A (for at-risk groups); Haemophilus influenzae type b; rotavirus; measles, mumps, and rubella (MMR); and HPV (for young girls only, to prevent cervical precancers and cancers). It is important that you are fully up to date with all of your routine vaccinations, including boosters, if you plan to travel. If you aren’t, then a health professional’s office should be your first port of call, before even departing.
  • Recommended vaccinations include all the vaccines that aren’t included in the routine schedule of your own country and are specific to travel to any given destination. These can include vaccinations for hepatitis A (if you don’t have it already), rabies, Japanese encephalitis, cholera, and typhus, among others.
  • Required vaccinations refer to vaccinations for yellow fever, meningococcal disease, and polio. Many countries where yellow fever is present will require you to have proof of vaccination before you are allowed in, and if you are heading anywhere else after traveling to a country where these diseases are present, you will need to show proof of vaccination — known as an international certificate of vaccination or prophylaxis (ICVP) — before entry.

Protect yourself from mosquito bites

Beds in Africa protected by mosquito nets
Mosquito bites are an absolute nightmare for any traveler. At best they will simply annoy you with painful and itchy welts, but at worst they can transmit a whole variety of diseases, such as yellow fever, dengue, Japanese encephalitis, and chikungunya, not to mention malaria.
Mosquitoes can be a problem in many parts of the world, but the Centers for Disease Control and Prevention (CDC), the World Health Organization, and the NHS’s Fit For Travel site are excellent places to find out where there are outbreaks of diseases such as dengue or malaria.
Even if you are in a low- to no-risk area, it is still a good idea to prevent mosquitoes from biting you in the first place, even if it is only to avoid the annoyance of painful bites. It should go without saying that the best thing you can do to protect yourself from being bitten is to use preventive measures:
  • Air-conditioned rooms are great for minimizing mosquito bites, as they are often better sealed and less likely to let them in.
  • Cover up. Wearing the right clothing is essential. Wear light, loose cotton clothing that covers most of your skin, especially around peak exposure times and places, for example, near bodies of water or at twilight or after dark, the peak time for malaria-carrying mosquitoes to feed.
  • Sleep under permethrin-coated nets where necessary.
  • Use anti-mosquito coils and plug-in devices where appropriate.
  • Always apply a good dose of 30–50% DEET spray, and reapply it regularly. Some people prefer more natural alternatives, but these are often not as effective or are often not clinically proven to be effective at all.
It is important to remember that none of these methods is completely foolproof. You can do everything right and still get bitten. I once caught dengue fever in India despite taking all the usual preventive measures, and it was one of the most unpleasant travel experiences of my life. It isn’t nicknamed “breakbone fever” for nothing! However, you can always minimize your risks with the tips above.

Take antimalarials when necessary

Adult hand holding pills to take on the road
As a nurse I advise people on taking antimalarials all the time, and one of the biggest problems is the huge amount of misinformation and fear there is surrounding this issue.
Basically speaking, if the area you are heading to is considered a high risk for malaria then yes, antimalarials are usually strongly advised. If you are visiting an area that is a low to no risk, then antimalarials aren’t usually advised.
Antimalarials are medications, and like all medications they have side effects. There isn’t one type of antimalarial; there are a variety of prophylaxes available, each of which has a range of common and rare side effects.
The most important thing to remember, however, is that each antimalarial affects different people differently. Just because one person develops side effects, that doesn’t mean the next person will. In fact, the people who suffer from severe side effects are in the absolute minority. A lot of people will only suffer mild side effects, and most will have none at all.
Now, knowing when they are necessary and when they are not is a different matter, and a lot of different factors have to be taken into consideration. These factors include the following:
  • The level of risk in your destination
  • The time of year you are traveling
  • Whether there are any current outbreaks
  • How long you are staying in any high-risk areas
  • What you will be doing (spending extended time in rural areas or cities, spending time near bodies of water; other high-risk factors, etc.)
  • Your personal medical history
  • Past experience with antimalarials

Make an appointment with a travel health professional

Health care professional giving a shot to a traveler overseas
It is important that you discuss your plans with a health professional well before you head off on your ‘round-the-world adventure. Many travelers instead leave it until the last minute. Too many people contact me for an appointment at my travel clinic a week before they leave not realizing that vaccinations may need to be timed weeks apart!
The average recommended time to see a health professional is 6–8 weeks before you leave, but personally I would aim for a little earlier than that, especially if you will think you will need more than one vaccination or if you have specific health concerns. The worst that will happen is that you will get an appointment closer to your time of departure if it is determined that you don’t need that amount of time to get things sorted.
******

These very simple steps will dramatically reduce your risk of getting ill abroad, but they are often so simple that many people overlook them. Before you set off on your trip of a lifetime, take a moment to think about your health and prepare properly. That way you will be able to enjoy your trip with peace of mind.
Remember that these are general health tips only, and while they are written by a qualified nurse, they are no replacement for a consultation with your travel health nurse or physician, where individual health concerns can be discussed based on your personal history.

Thursday, 11 May 2017

HOW TO SPEND 4 DAYS IN BANGKOK

When people tell me they hate Bangkok, I understand. When I first went to Bangkok in 2006, I despised the city and couldn’t wait to get out.
It’s not the best tourist city in the world. Outside of shopping and a few temples, there’s not much to do. Plus, it’s dirty and it smells.
It wasn’t until I lived in the city that I really fell in love with it.
Bangkok is not a city that opens itself up easily, and most people spend just a day or two here before leaving to go to the islands or the jungle. But while as a tourist you may not need tons of time to “see” the city, Bangkok has more than a few days’ worth of temples and activities.
Bangkok may not have lot of “tourist attractions” the way that Paris, London, NYC, and Buenos Aires do but that’s OK. Bangkok is not that kind of city – this is a place to wander, eat, and imbibe. It doesn’t have to be a love-it-or-hate-it city but it is worth seeing.
Here’s my suggested itinerary for the City of Angels that will have you ticking off the major sites and some of the lesser known ones too:

Day One

The Grand Palace, Wat Pho, and Wat Arun
The Grand Palace in Bangkok, Thailand
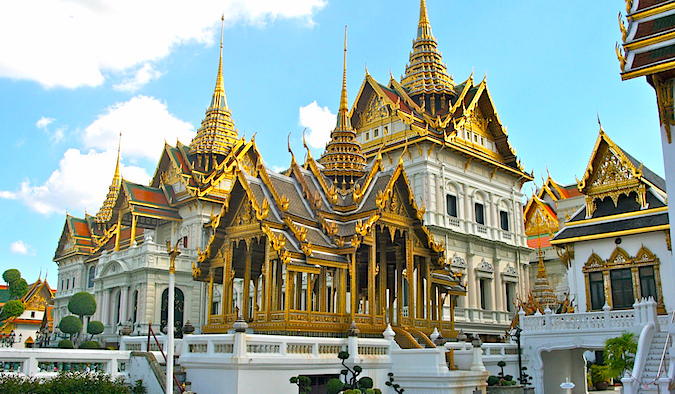
Start your visit to the city with a tour of the Grand Palace (Royal Palace) and neighboring Wat Pho, home to the famous reclining Buddha and massage school. The Royal family doesn’t live in the palace (it’s only used for official state functions) and you can’t go into any of the buildings, but wandering the grounds and open temples is worth the visit. It’s beautiful and the craftsmanship in the architecture is amazing. Go first thing in the morning to avoid the crowds.
Afterwards, wander down the street to Wat Pho and the famous reclining Buddha (as well as the famous Golden Buddha). The Wat Pho complex fills a city block so while seeing the statues doesn’t take long, you could spend a solid hour wandering the maze-like temple grounds.
Next, head across the river to Wat Arun (Temple of the Dawn) and get stellar views of the city from atop the temple. It’s my favorite temple in the city because of the view!
Note: Be sure to wear clothes that cover your legs and shoulders; it’s considered disrespectful to wear revealing clothes. If you don’t, you can rent pants or shirts at the palace. At Wat Pho, they give them out for free.
Cruise the river
Cruise on the river in Bangkok, Thailand
Take a tour of the Chao Phraya river, a relaxing and beautiful experience that shouldn’t be skipped. Don’t take an overpriced tour, though. You can ride the water taxi up and down the river for around 20 baht (less than $1 USD). Start at the central pier, go to the end, and come back. Presto! Instant tour! (The difference with the official tourist boat, which makes less stops, is that they have someone that gives brief descriptions about important sites as you go.)
Tour the temples
Temple in Bangkok
Bangkok has a lot of beautiful temples. Hire a tuk-tuk driver to take you around for the day to see the temples. Just make sure he doesn’t take you shopping along the way — drivers get kickbacks if they bring customers into certain shops. They can be annoying about this but stay firm! This is often the cheapest and most efficient way to see the temples throughout Bangkok. My favorite temples are:
  • Wat Saket and the Golden Mount
  • Wat Traimit
  • Wat Benchamabophit
  • Wat Kalayanamit
Visit Khao San Road
The infamous Khao San Road
The backpacker capital of the world, this road (along with Soi Rambuttri) in Bangkok is where you’ll find endless bars, shops, street food, international restaurants, vendors, locals, and activity all day and all night. It’s also a popular spot on the weekend for Thais. I personally like the quieter Soi Rambuttri, but Khao San is an awesome place to sit outside and meet other travelers. Be sure to visit Brick Bar, the hidden-away Thai ska bar where only locals go.

Day Two

Check out the floating market
Floating Market in Bangkok, Thailand
You can enjoy a half-day visit to the floating markets around the city (Khlong Lat Mayom and Thaling Chan are the two most popular). It makes for a filling morning adventure and if you get there early, you can avoid a lot of the crowds. Thaling Chan is the more touristy one so to avoid the hordes of tour groups, definitely get there early. Both markets can be visited by public transportation. I love the chaos, the smells, and the little ladies cooking and selling you various treats as they paddle by you. You never leave hungry!
Explore Chinatown
Chinatown in Thailand
Chinatown in Bangkok is a culinary feast. You can go shopping here and buy lots of useless souvenirs, but what I love about this area is the food. On the chaotic vendor-lined streets, you’ll find a ton of vendors selling food you hardly see anywhere else in the city. This is a crowded and busy part of the city but one of my favorites. At night, the area is one of the best places in the city to get delicious seafood.
Visit the malls
Mall in Bangkok
Okay, hear me out on this: Malls in Bangkok are more than just malls – they are social hubs (thanks in part to the air-conditioning) where people eat (mall food courts in Bangkok are delicious), drink at bars, see movies, sit at coffee shops, and even go bowling! A lot of life in the city happens in the malls and each has its own character. Start knocking some off your list by heading to Siam Square to visit MBK (cheap phones, shirts, and DVDs), Paragon and Emporium (upscale shopping), Terminal 21 (delicious food court), or Central World. Mall life is part of Bangkok and if you want to understand the city, you need to visit a mall.
Experience the Siam Rush Hour
BTS Train
Make sure you’re in the Siam BTS train station at 6pm. A unique cultural thing happens then. I don’t want to spoil the surprise, so I won’t tell you what it is but it’s worth it!
Watch a Muay Thai fight
Muay Thai Fighting
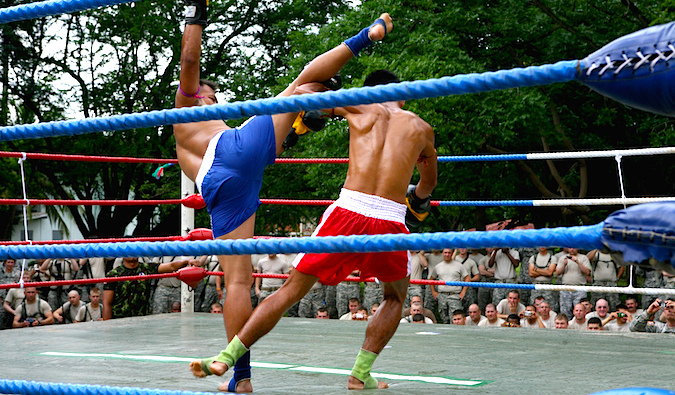
Muay Thai (a combat sport involving striking and clinching) is everywhere in Thailand and Thais take it very seriously. Fighters train for years. Don’t bother seeing the tourist Muay Thai fights on any of the islands. Instead, spend a night seeing an authentic match with world-class fighters in Bangkok at Rajadamnern Stadium.

Day Three

Shop and eat at the Chatuchak Weekend Market
Weekend Market in Thailand
The weekend market is one of the best things in Bangkok. It’s the size of many football fields and quite crowded. You’ll find everything and anything from authentic designer clothes to their fake counterparts to phones to knockoff movies to pets to backpacks to kitchenware. There’s a big dining area with great, cheap food. Don’t miss coming here.
Tour Jim Thompson’s House
Jim Thompson's House
Jim Thompson was an American spy and silk merchant in Thailand during the ’50s and ’60s who vanished mysteriously in 1967 while in Malaysia. He made his home in the traditional Thai style, decorating it with beautiful teak wood and a surrounding garden. The tours feature a lot of history about Jim, the silk industry, and how and why Thais design their homes the way they do. Admission fees go to underprivileged kids.
Visit Lumpini Park
Lumpini Park
Lumpini Park is Bangkok’s Central Park. This sizable green space is well worth a visit if you’re a people watcher. At all hours of the day, you’ll find people playing sports, walking, biking, practicing tai chi, or just relaxing. In a city that lacks much green space, you’ll probably crave a little wildlife after navigating all the traffic and vendors in this concrete jungle.

Day Four

Enjoy an event at the Bangkok Art and Culture Center
Bangkok Art and Culture Center
This contemporary arts center highlights and hosts art, music, theatre, film, design, and cultural events in its exhibition and performance spaces. In a city that lacks a real art scene, this is an enriching place to see some local art.
Brave the Bangkok Corrections Museum
Bars on the window
The Bangkok Corrections Museum is located on the site of a former maximum-security prison and has been a museum since 1939. You can learn about the cruel methods of punishment used in the past and see torture devices and wax figures depicting execution scenes.
Visit the National Museum
National Museum in Bangkok, Thailand
This museum focuses on Thai culture, with highlights that include a large collection of musical instruments, recorded music, ornate royal funeral chariots, and impressive wooden carvings. The museum isn’t very big and the signs aren’t very detailed, but the artifacts are interesting to look at. It’s best to go when they offer English tours on Wednesdays and Thursdays at 9:30am.
Take a food tour
Delicious Thai food
Bangkok is all about food. You’ll never stop eating here, but the sheer variety can be overwhelming! To get a deeper appreciation of Thai food, take a food tour. The two best are Bangkok Food Tours and the ones offered by Mark Wiens of Migrationology.

Some other options

  • Museum of Siam – This museum uses a variety of media to explore the origins of the Thais and their culture. The galleries deal with the origins of the country and its people told through various multimedia. It’s a fun little interactive museum housed in an old 19th-century European style building.
  • Wakeboard at Lake Taco  If you want to get out of the city and have some adventure, head to the eastern outskirts of Bangkok for some wakeboarding (i.e. riding on a short board while being pulled by a motorboat). This is a popular thing to do with expats and though I never did it, my friends always said it was a fun time.
  • Take a cooking class – Take an afternoon to learn about Thai cooking and try your hand at making some food. You’ll find cooking classes throughout the city but the vegetarian restaurant Mai Kaidee has a really good one!
There’s more to Bangkok than just temples, shopping, and traffic! It’s a city whose charm emerges slowly. With four days, you can see the major and minor attractions and get a robust overview of one of my top three cities in the world!

Monday, 8 May 2017

18 OF THE BEST SPOTS IN PATAGONIA

On the second Wednesday of the month, Kristin Addis from Be My Travel Muse writes a guest column featuring tips and advice on solo female travel. It’s an important topic I can’t adequately cover, so I brought in an expert to share her advice for other solo female travelers! Here she is with another awesome article!
When I think about the perfect vacation spot for outdoorsy types, Patagonia is pretty high on the list. This region has gripped me ever since I first saw photos of it years ago, thanks to those unique, jagged peaks and the incredible color of the glacial waters. It looked pristine and wild. This year I finally got to live my dream and visit the region.
I spent two months hiking and hitchhiking around the region. I couldn’t believe how many glaciers and tiny, remote villages there are scattered all throughout Patagonia.
When I think about my favorite places, it is pretty hard to narrow it down, but here’s a list of 18 of the very best natural spots (because 17 is simply too few):
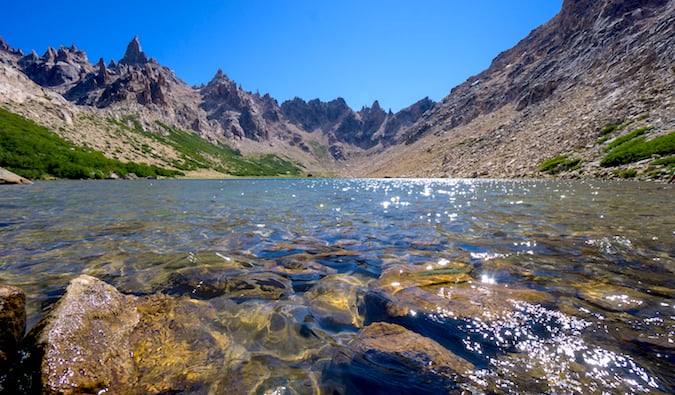
1. Cerro Tronador
Cerro Tronador
The 18km trek to Cerro Tronador glacier is located on the outskirts of Bariloche, Argentina, the northern gateway to Patagonia. It’s one of few glaciers you can truly sleep right next to and watch the sunrise over.
Leave early enough in the day to make it up there with plenty of time to walk around the rocks and the glacier. The glacial melt forms pools and tiny lakes all over the surface of the rock, which reflect the sunsets and sunrises over the mountaintop. The panoramic view is the best in the whole area at any time of day.
2. The Hike to Hotel Refugio Frey
Refugio Frey
There are two ways to get to Refugio Frey: either you can walk up a forest path or climb over rocks to get there. It’s a full-day hike from the ski resort in Bariloche, and I’d rate its difficulty as medium.
The view of some of the lakes in the distance from the top is magnificent, and it’s so much fun for those who love climbing hand and foot.
Plus, the Refugio Frey has a chilled-out atmosphere, a big lake to hang out around, and nice, cold drinks. Even in the summer months, there’s plenty of space for everyone — hikers and rock climbers alike.
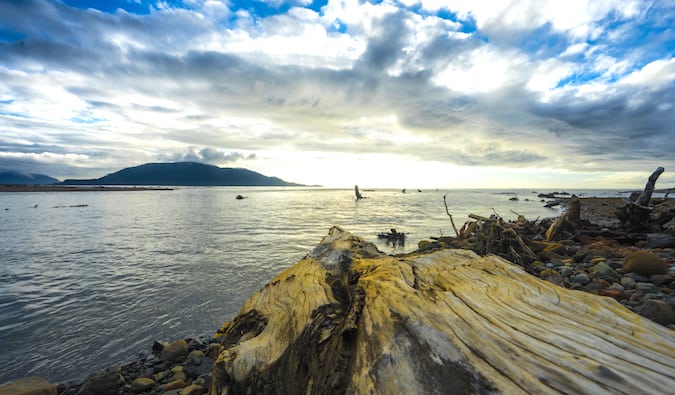
3. Chaitén’s Haunting Beach 
Chaitén’s haunting beach
From Bariloche, most head down Ruta 40, straight south through Argentina. There’s a better way through Chile, however, that goes through the rural Carretera Austral and the heart of Patagonia. One of the more northern towns along that road is Chaitén, which was covered in ash and debris after a volcano erupted in the vicinity in 2008. The town was evacuated in time to rescue the residents, but the population is still a fraction of what it used to be.
The ash and eery remains of trees still cover the beach. Some of the houses nearby are still buried in ash, but they’re slowly rebuilding and it’s a very quiet and peaceful spot for a sunset.
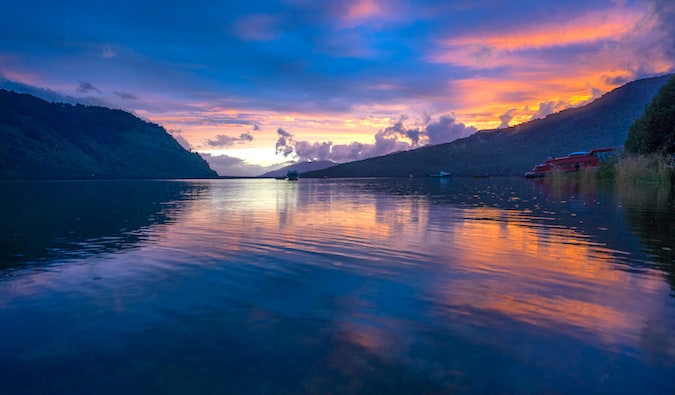
4. Puyuhuapi’s Bay
Puyuhuapi’s bay
Puyuhuapi, a town in the Chilean fjords along the Carretera Austral, is rural, quiet, and the kind of place I could get stuck in for a while. It’s mostly farms, small campsites, and boats that line the shore; the water is so flat and calm that it reflects the sunsets brilliantly.
You can go fishing there, try to talk a local into taking you on his fishing boat, go on a long walk, or best of all, make it your base to explore the national parks on the outskirts of town.
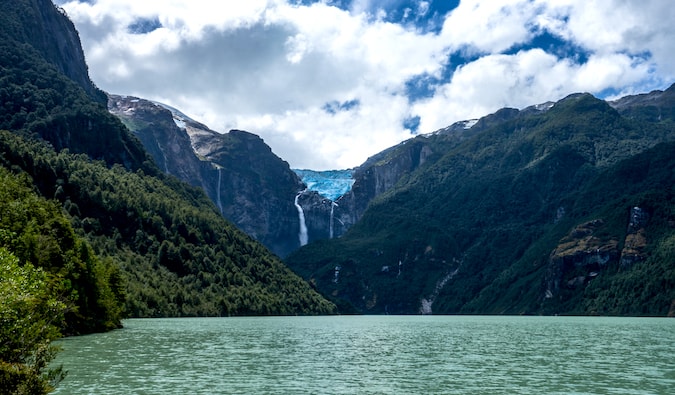
5. Queulat Glacier
Queulat Glacier
Queulat hanging glacier is at the end of a small ice cap that splits into two waterfalls as it spills down a rock face. Now there are plenty of hanging glaciers in Patagonia, but most of them are hard to access or not as large and raging as this one, and that’s what makes it special.
Queulat National Park is located 22km outside the town of Puyuhuapi and costs 4,000 CLP to enter. To reach the lookout point, you’ll have to trudge through 3km of mud, so bring sturdy and waterproof shoes. You can also camp in the national park overnight to beat the crowds to the lookout point in the morning.
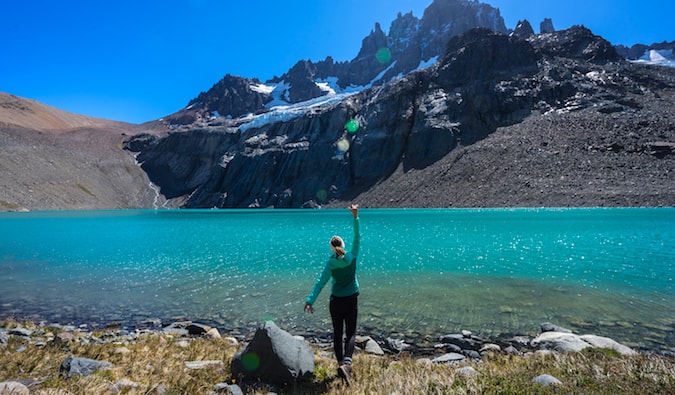
6. Cerro Castillo Glacier
Cerro Castillo Glacier
Patagonia has so many glaciers that eventually I stopped counting or even pointing them out, but this was the first time I’d laid eyes on a glacial lake so blue, and that’s what made Cerro Castillo so special. The black rock, white glacier, and bright blue lake combined in a unique way compared to other famous hikes in Patagonia that didn’t have such dark, rocky mountains.
It’s possible to hike there and back in one day, and though steep, the hike provides a gorgeous panoramic view of the surrounding multicolored hills that would make it worth the energy even without the glacier at the top.
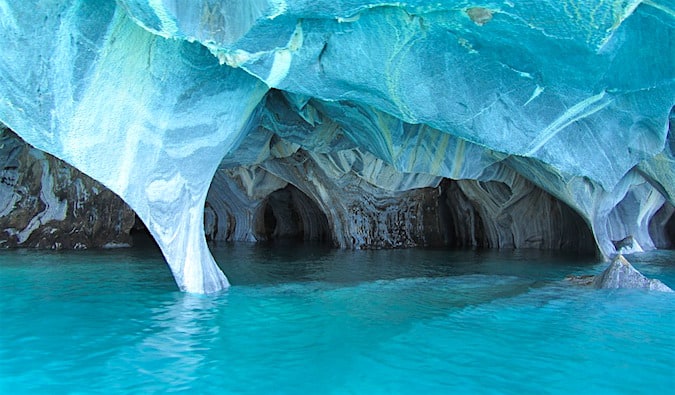
7. The Marble Caves
The Marble Caves
These marble caves over General Carrera Lake (morbidly, the same ones the founder of The North Face passed away in earlier this year) are what made the town of Puerto Río Tranquilo famous.
They’ve been carved out by the clear blue lake water, and some of them are big enough to take a boat through, giving you a chance to check out the swirling formations and the marble’s yellow, white, and gray colors. The boat tour lasts about an hour and costs roughly $20 per person.
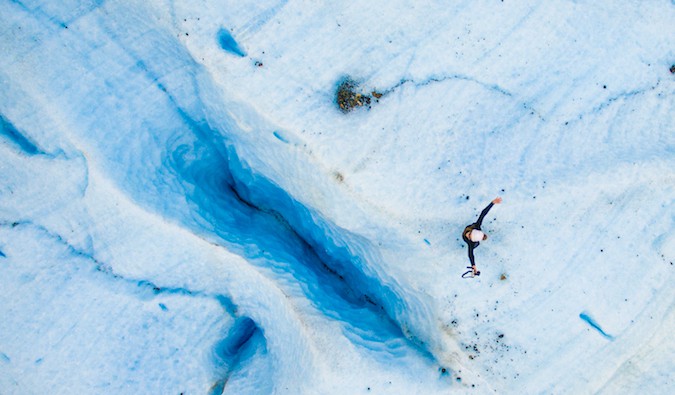
8. Exploradores Glacier
Exploradores Glacier
When I asked the local guide how long tours of the Exploradores glacier have been going on, he said it has only been a few years. Then he told me that, even though he grew up right near it his whole life, he only found out about the glacier five years ago. That’s what makes this glacier such a cool one to explore: it’s still being discovered. Each month or so, a new wave or cave forms in the ice as the glacier melts.
The tour departs from Puerto Río Tranquilo (the same town with the aforementioned marble caves), and it takes about two hours to drive to the trailhead. From there, it’s a 2- to 3-hour walk to the glacier moraine and eventually to the ice. The tour only costs $60, about 1/3 of the cost of the more famous glaciers down south, though it requires a bit more fitness due to the long hike in.
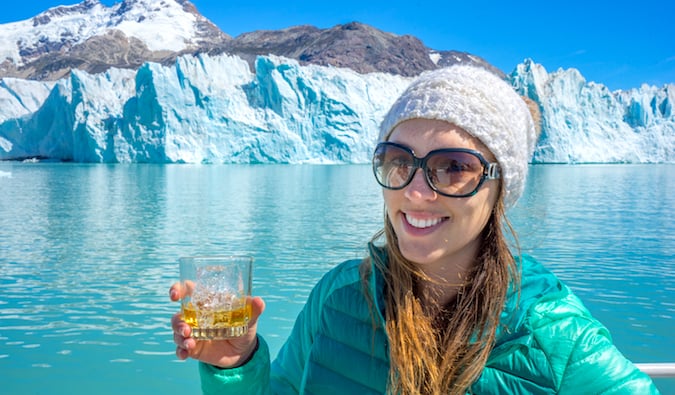
9. The O’Higgins Glacier
The O’Higgins Glacier
Villa O’Higgins is the last town on the Carretera Austral and where one can take a boat past the O’Higgins Glacier to what is, officially, the most remote border post in Chile.
An attractive feature of this glacier, just like Exploradores, is it’s not nearly as visited as Grey Glacier or Perito Moreno down south, so there is plenty of boat space. The glacier is over 300 meters tall, and the boat offers a chance to get up close while enjoying a whiskey with some glacier ice in it.
From there, your only choice is to return to Villa O’Higgins by boat or alight on the Chilean border.
10. No-Man’s Land
No-Man’s Land
After leaving the boat and the Carretera Austral, it’s a 22km walk into Argentina. So, for most of the day, I was literally in two places at once. Or maybe just in the middle of nowhere. I couldn’t figure that one out. Parts of the path are extremely muddy and if you attempt it, you’ll have to traverse them carrying all of your stuff — unless you can manage to hire a horse, which I couldn’t because they were on a break that day.
The main benefit to doing this, apart from avoiding backtracking to get back into Argentina, is the opportunity to see the famous Mt. Fitz Roy from behind. It’s a rare view of a pretty famous mountain!
11. Cerro Torre
Cerro Torre
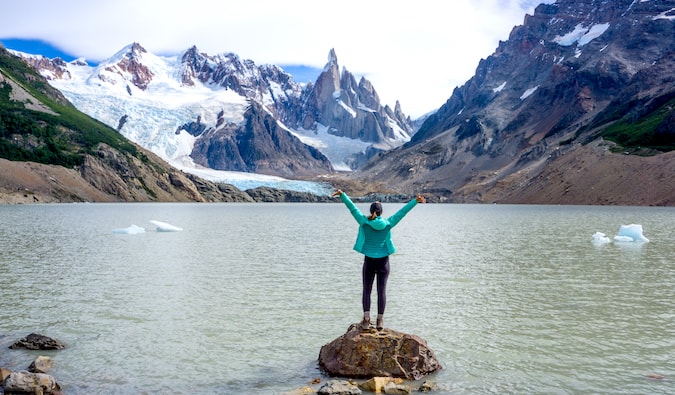
After walking through no-man’s land, you’ll arrive in El Chaltén, which will have more tourists — but upon hiking the trails, it will become obvious why. The mountains are super unique-looking, huge, and full of glaciers. Plus, this is a much more accessible part of Patagonia, connecting to Argentina’s larger and more-traveled Ruta 40.
The trail from town to the Cerro Torre is pretty flat and easy for most of the trek, but it is long, at 22km total. The whole way there, you’ll encounter various views and photo-ops of the Cerro Torre before arriving at the lake just before the famous mountain. It’s the only one in the area with three continuous peaks, popular with skilled rock climbers.
12. Paso Viento
Paso Viento
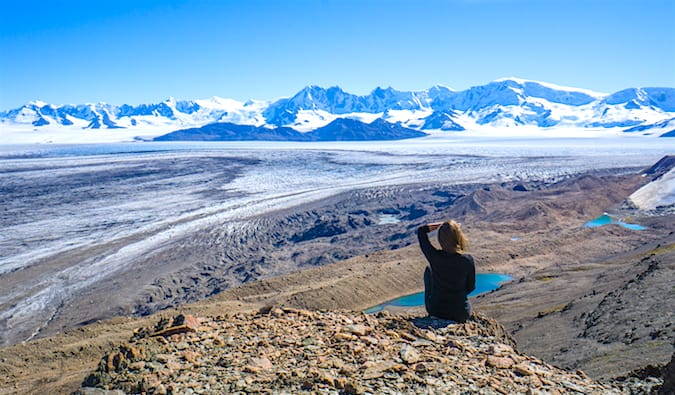
There are five trails in Patagonia that you can see the Southern Patagonian Ice Field from, and the Huemul Circuit outside of El Chaltén, Argentina, is one of them. It offers one of the more impressive 180-degree views of the ice field that you see without having to make an expedition to the glacier itself.
It’s not without its challenges: you have to walk over a rocky glacial moraine for hours to get there, which is code for try not to fall into the cracks and die because nobody is around to to save you, plus you have to rent a harness and pully to traverse a couple of rivers. You also have to carry absolutely everything with you that you’ll need, including all of your food, a tent, sleeping bags, and cooking gear. It’s a lot of effort, but it’s a way to see one of the most complete views of the Southern Patagonian Ice Field from a trail.
13. The Ruta 40 just outside of El Chaltén 
The Ruta 40 just outside of El Chaltén
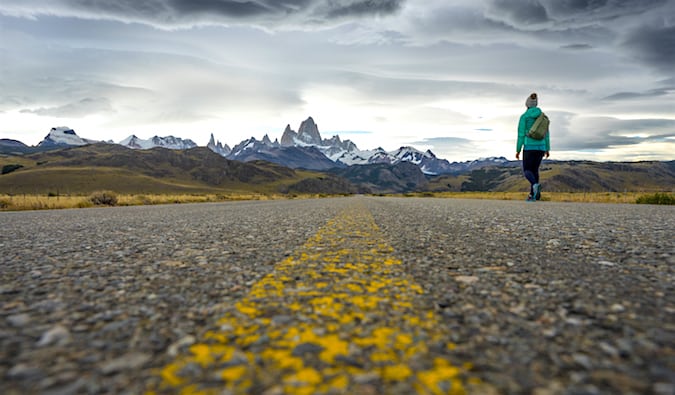
Take a long walk out of town, about a mile or so, along the famous Ruta 40, Argentina’s longest road, and you’ll see this view of Monte Fitz Roy (the tallest mountain in the middle), the Cerro Torre, and the mountain chain that is on the Patagonia brand label.
It’s a incredible spot for a photo to make it look as if you’re walking into paradise, and a way to see the entire famous mountain chain all at once. The view gets better as you continue down the road, so bring along a skateboard if you want to make a day out of it and keep going.
14. Condor Lookout
Condor Lookout
This lookout just above El Chaltén is a great spot to view the sun as it rises and is reflected on Monte Fitz Roy. It’s only about a 15-minute walk from the ranger station in town to the lookout point, which makes it so much more accessible for an early-morning hike than trying to reach Fitz Roy or Cerro Torre by sunrise.
Bring along a headlamp and watch, as the mountains turn red when the sun hits them. A true must-do if you find yourself in El Chaltén.
15. Refugio Dickson
Refugio Dickson
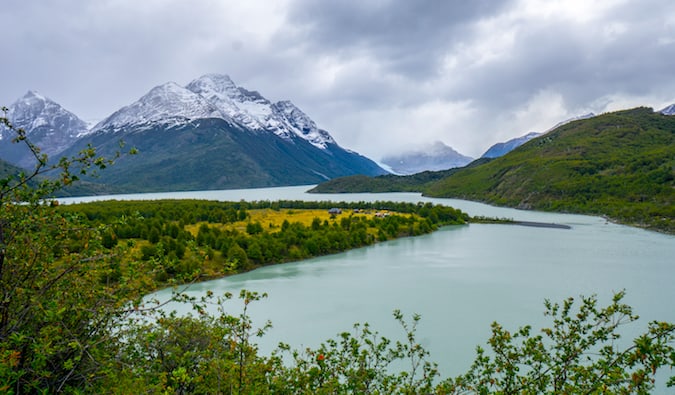
You can’t go to Patagonia without visiting the crown jewel, Torres Del Paine National Park in Chile. It’s a source of national pride for Chile, and those who visit the park quickly understand why. The rock formations are Chile’s answer to those around El Chaltén, with their own three spires over a glacial lake.
The most famous trek there can be taken in three ways, as a Q (the longest), as an O (which takes about eight days), or a W (which takes five). The only way to see this beautiful part of the trail is to take the O. I loved it because it’s one of the most tranquil campsites, and the friendly rangers who play soccer there and passed around a box of wine with me only made it more fun.
16. Paso John Gardner
Paso John Gardner
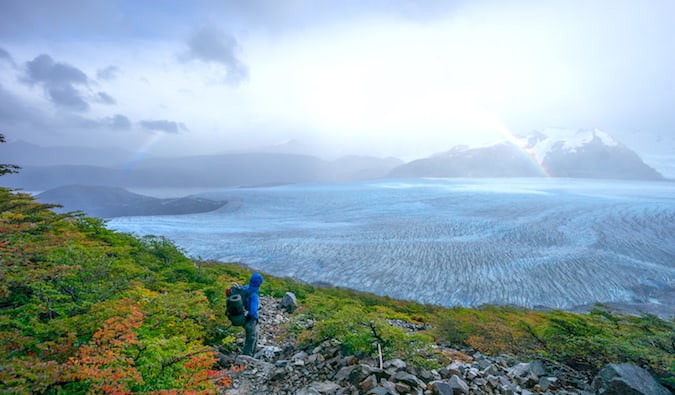
For those who do the O and Q treks, you have to summit the Paso John Gardner at 1,200 meters, which is the toughest part of the trail (but not as tough as the Huemul Circuit!). This is another chance to see the Southern Patagonian Ice Field from a hiking trail, and you’re next to it pretty much all day after the pass. I even got a rainbow to guide my way.
It’s also the only way to see the Grey Glacier from above, so if you want to hike next to a famous glacier all day, you’ve got to do the O!
17. French Valley
French Valley
The French Valley is part of the W trek, and the best thing is you don’t have to carry all of your gear along with you for this one, since it’s a trek up and then back down and out to rejoin the trail.
If you’re tempted to just go partway, trust me, you ain’t seen nothing yet! The very end is the prize. It’s a panoramic view of the surrounding mountains and a closer look at many of the park’s glaciers and famous peaks carved out almost like a bowl, with mountains all around you. It’s a challenging and rocky hike, so bring along hiking poles to help your knees out.
18. The Torres (of course!)
The Torres
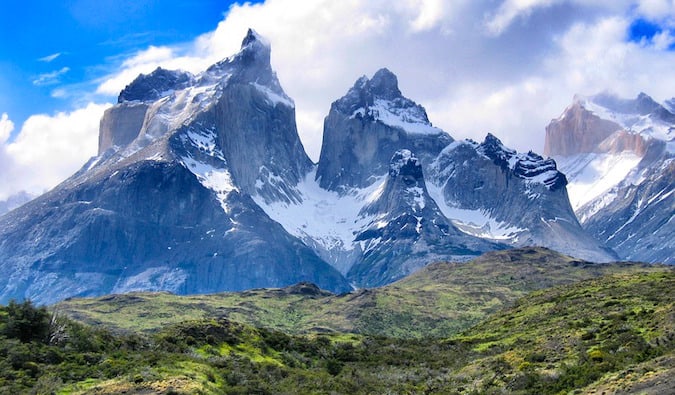
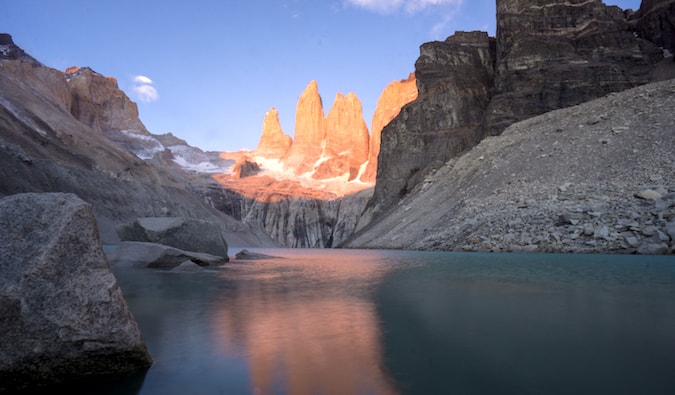
The Torres are what made the park famous, and when you see them for yourself, it’s obvious why: they’re giant, jagged peaks covered with a glacier and positioned perfectly for the sunrise. The red reflection of the sun on them is amazing, but if you want to get them all to yourself, hike up in the afternoon for sunset. You won’t get the amazing glow on the rock, but there won’t be many others around, which is a nice benefit. I went up both at sunset and sunrise and was glad to have had a chance to see it both ways.
****
Patagonia is an incredible part of the world, and this list could have easily been double or triple this length. For those who enjoy hiking or those who just want to dabble a bit in the great outdoors, there are options there for just about everyone.

HOW THIS FAMILY OF 4 TRAVELED THE WORLD FOR $130 A DAY

t’s been a long time since we’ve had a blog post on family travel on this website so today, I’m excited to introduce to you Cliff from Live Family Travel. His San Francisco based family spent ten months traveling the world on a career break. They homeschooled and enrolled their kids in schools overseas, spent time with family, saw the world, and bonded as a family. And, they did so, on a budget this nomad is impressed with. Today, Cliff is going to share how his family did it – and advice for other families looking to do a big round the world adventure.
My dream of taking my family on a world tour began in Nicaragua in the summer of 2012 with my two daughters, who were three years old and six months old at the time. Most people thought my wife and I were crazy to go to Central America with two little girls. But, for three weeks, we relaxed at the beach in San Juan del Sur, rode horses through the countryside, and hung out in the bustling town of Granada.
It was an experience we vowed to repeat.
Over the next couple of years, we traveled together to various destinations, including Puerto Rico, Peru, Argentina, and Guatemala. We enjoyed these short trips but, the more we traveled, the more I wanted to go longer – I wanted a year-long trip around the world.
In 2015, that dream became a reality as we spent 10 months traveling in 10 countries.
But to make that happen we needed to be creative with how we saved and spent our money.

How We Saved Money and Budgeted for Our Trip

Family of four while on their travels in Spain
My family lives in one of the most expensive areas in the world: Silicon Valley outside San Francisco, California. Housing prices are extremely high and the overall cost of living is higher than most cities in the United States. I worked as a marketing manager in technology companies while my wife took care our two daughters.
After our trip in Nicaragua, we decided that we would make family travel a priority in our lives. From July 2012 to December 2014, we saved approximately $40,000 USD, which equates to $1,333 USD per month. Saving that much money on one salary in one of the most expensive areas in the world was not easy. It took some crafty saving skills, but here is what we did:
  • I worked freelance jobs. I earned extra money for work on short-term marketing projects, in addition to my full-time job. Now with the on-demand gig economy, there are many great options to earn extra money, including UberLyft, and Wonolo.
  • We refinanced our mortgage. With a lower interest rate for our home mortgage, we saved over $500 USD per month.
  • I reduced my 401(k) and 529 contributions. Instead of putting all of my savings into my retirement account and my daughters’ education accounts, I decided to reallocate about $500 USD per month to our travel funds.
  • We reduced our spending. We cooked most meals, capping our food budget at $1,000 USD per month. We also stopped buying unnecessary electronics, clothing, and toys, limiting our discretionary spending to $500 USD per month.
By earning more, spending less, and reallocating a portion of my savings to travel, our travel budget gradually increased to a point where we felt comfortable enough to take time off to travel the world.
But in order for this trip to really make financial sense, we needed to do something about our house while we were away. We did this by renting our house with a family found through Craigslist. Thankfully, this area is in demand and after accounting for our mortgage, insurance, and taxes, we were making $500 USD per month profit from the renters, which helped pad our travel fund.
Additionally, we sold our SUV, which ended our $700 USD per month loan payment. We also sold all our furniture and about 80% of our electronics, clothes, shoes, and toys through Craigslist and some local Facebook groups. In total, we made about $5,000 USD from these sales.
With about $10,000 USD of extra money from rent payments and selling our stuff and the $40,000 USD in savings, we created a budget of $50,000 USD for our trip. We knew we had to make our money stretch as far as possible by being savvy with how we saved and spent on the trip.
For more information on how you can save money for your own trip, click here.

How Much We Spent

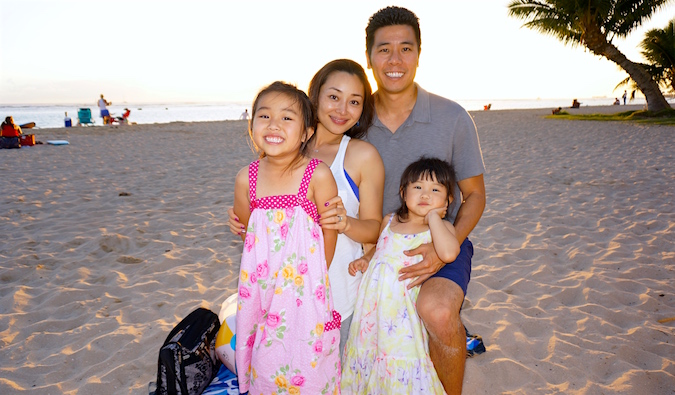
Cliff's family on vacation on the beach
Below is a list of some of the expenses of our trip per country visited. (Later I’ll go into more detail about how we accomplished this.) With this information, I hope you realize that extended family travel around the world can be affordable and realistic. All you need is a curiosity to explore the world, flexibility, and a bit of budgeting skills.
Honolulu, Hawaii 
  • Duration: 1 month
  • Accommodations: Free, stayed at my mother’s place
  • Transportation: $800 USD
  • Flights: $2,400 USD
  • Total: $6,000 USD
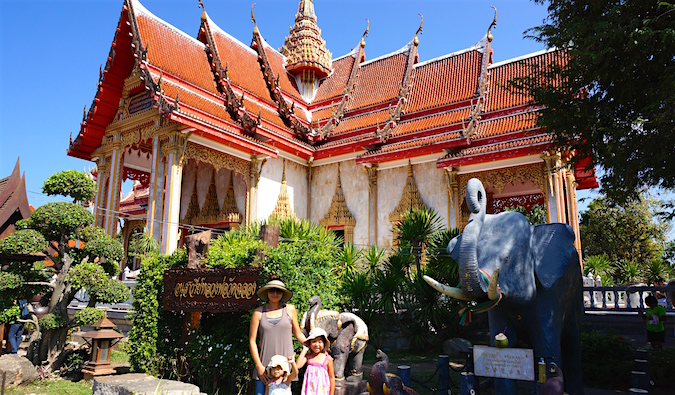
Phuket, Thailand
  • Duration: 3 months
  • Accommodations: $2,000 USD ($667 per month for one-bedroom apartment)
  • Transportation: $400 USD ($133 per month)
  • Schooling: $2,100 USD ($350 per month per kid)
  • Visa extensions: $200 USD total
  • Flight from Phuket to Hangzhou free with Star Alliance points
  • Total: $8,000 USD
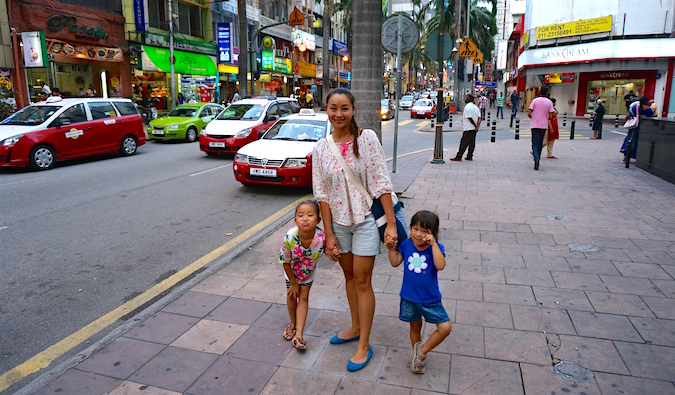
Kuala Lumpur, Malaysia
  • Duration: 3 days
  • Accommodations: $150 USD
  • Flights: $435 USD
  • $750 USD total
Hangzhou, China
  • Duration: Approximately 2 months
  • Accommodations: Free, stayed at my wife’s parents’ place
  • Schooling: $400 USD total for 2 months ($100 per month per kid)
  • Total: $2,500 USD
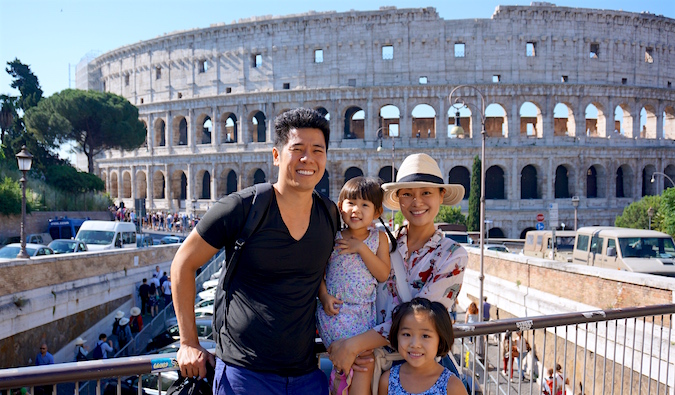
Europe – Italy, Spain, France, Belgium, Germany, Netherlands
  • Duration: 2.5 months
  • Accommodations: about $5,200 USD (average of $71/night) for 73 nights
  • Food: $3,500 USD (average of $47 per day)
  • Shopping and leisure activities: $1,500 USD (average of $20 per day)
  • Schooling: $800 USD for 4 weeks in Barcelona ($400 per month per kid)
  • Flights and transportation: $5,000 USD
  • Total: $16,000 USD
Hong Kong
  • Duration: 3 days
  • Accommodations: Free, stayed at friends’ place
  • Flights: Free stopover in Hong Kong on the way back to Hangzhou from Europe
  • Total: $300 USD
Hangzhou, China
  • Duration: Approximately 2 months
  • Accommodations: Free, stayed at my wife’s parents’ place
  • Total: $2,500 USD
Flights to Bay Area: $2,000 USD
Further Reading: Check out a breakdown how we spent our money in Europe.
Breakdown by Expense Type
  • Flights: $9,000 USD
  • Other Transportation: $2,000 USD
  • Accommodations: $7,500 USD
  • Schooling: $3,300 USD
  • Food, shopping, and leisure activities: $17,750 USD
GRAND TOTAL: $39,550
To get an idea of how much your dream destination costs, check out these free travel guides

How We Saved Money During Our Trip

Cliff's wife and two daughters in Thailand
In order for our travel budget to last 10 months, we had to be efficient with the way we spent our money. We did this in a number of ways:
  • We used our frequent flyer miles. In total, I used 250,000 miles for free airplane tickets on Star Alliance airlines on this trip: 100,000 of those miles came from signup bonuses for Chase Sapphire Preferred credit cards for both my wife and myself. After $4,000 USD spent on each card, we were awarded the signup bonus of 50,000 points, which were converted 1:1 for Star Alliance miles. It’s our travel credit card of choice because there are no foreign transaction fees. Another 100,000 of those miles came from the accumulation of miles through flights flown by all four of us in the previous years. The remaining 50,000 miles came through spending on the cards over two years. A great site I use is The Points Guy and Matt has a great book on the subject too.
  • We purchased cheap flights. For flights that were paid in full, I used travel comparison sites like Google Flights and Kayak to find the best prices. In Asia and Europe, there were many budget airlines that made flying economical, so those flights didn’t take a huge chunk of our travel budget. For example, for all four of us, one-way flights from Venice to Barcelona were $420 USD on Vueling Airlines and round-trip flights from Phuket to Kuala Lumpur were $435 USD.
  • We stayed at our parents’ places. For about 45% of our time away from home, we stayed with my mother in Honolulu, Hawaii, and my wife’s folks in Hangzhou, China. Not only did we spend quality time with our extended families, but we also saved a ton of money on accommodations. While our situation is unique in that we have parents in different parts of the world, there are great options for free housing, including sites like Couchsurfing, Servas, Hospitality Club, and housesitting opportunities. It’s not as easy as what we had but it still works and is an option families can use!
  • We rented Airbnb apartments. Especially in Europe, where accommodations costs can be expensive, we stayed in furnished apartments ranging from a studio in Paris to a two-bedroom apartment in Barcelona for an average of $71 USD/night. Our accommodations costs were much cheaper than if we had stayed in hotels. (If you’re new to Airbnb, get $35 off your first stay!)
  • We did free activities. There are lots of free activities to do with kids while abroad, including going to beaches, parks, markets, shopping malls, churches, and outdoor festivals. Even for expensive cities like Rome and Barcelona, there were always free things to do. For example, from having read an article in National Geographic, we went to the Picasso Museum in Barcelona on one of its free Sundays, and we walked around the Gothic Quarter of Barcelona to watch the various street performers.
  • We cut our transportation costs. In Phuket, we rented a moped (for all four of us!) for $133 USD per month. In China, we took cheap taxis or rode the bus. In Europe, we rode the subways or the buses, which were not expensive (e.g., $1 USD per bus ride in Florence and Barcelona). By taking public transportation or walking whenever possible, we kept our daily transportation costs low.
  • We cooked most meals. With a kitchen at our parents’ places or our Airbnb apartments, we ate a majority of our meals at home, especially in Europe. When we ate at restaurants, we ate simply or at inexpensive lunch buffets (e.g., $10 USD for a Japanese lunch buffet in Florence). In Asia, eating at restaurants was fairly cheap, so we didn’t need to cook at home as much.
For more information on how to save money while you’re on the road, click here.
****
Family travel can be stressful, with all the planning, movement, logistics, new time zones, new languages, different foods, and taking care of the kids. It’s never really a vacation with children, because the majority of your time and energy will be used to take care of them.
But family travel is also very rewarding. 
Cliff's family exploring one of many cities on their round-the-world trip
When you travel together, you collect memories and build the bonds of your family through the shared experiences of being in different countries, interacting with different people, speaking different languages, and eating different foods. By getting out of your comfort zones and traveling the world, you allow your family to learn and grow in ways that could never happen at home.
One of my warmest memories (and there are many) comes when we were living in Barcelona, Spain. We found a trilingual preschool (English, Spanish, and German) that allowed our daughters to enroll for the entire duration of our stay in Barcelona. They became immersed in the Spanish culture and language, made local friends, and went on many field trips. It was amazing watching them learn to interact with the locals, learn a culture, and grow as people. They developed a cultural understanding that just wouldn’t have been possible if we had stayed home. I know this is a positive experience that will live with them forever.
Whether for three weeks during a winter break, three months in the summer, or a full year, budget family travel is possible. Traveling through 10 countries in 10 months with my family was a great learning experience and a dream come true. Despite all the headaches, fevers, upset stomachs, hot days, lost items, frustrating situations, and everything else that we went through during our trip, it was all worth it and we grew closer together as a family.
And there’s no better feeling than that as a parent.